Making Jewelry for a Grade?
I've had a lot of interesting assignments during my time at Dartmouth. I've Twitch streamed Undertale—for a grade. I pitched a modern adaptation of a Shakespeare play that would primarily be performed by drag queens—for a midterm. I've made an hour-long podcast episode about live action Disney adaptations—as a final exam. (Note: these were all different classes, departments, and terms!) And this term I added to my ever-growing list of favorite assignments. This spring (24S) I took a course called "Ancient Greek and Roman Engineering and Technology" in the Classics Department. For my final exam, I made a ring in the jewelry studio modeled after Ancient Egyptian swivel rings.
Day 1: My first day at the Jewelry Studio I talked to Jeff Georgantes—the Studio's primary instructor—about my plan for the ring, showed him inspiration pictures of swivel rings from one of my sources for my midterm project (which was also about Ancient Jewelry), and picked out the stone bead that I would use.

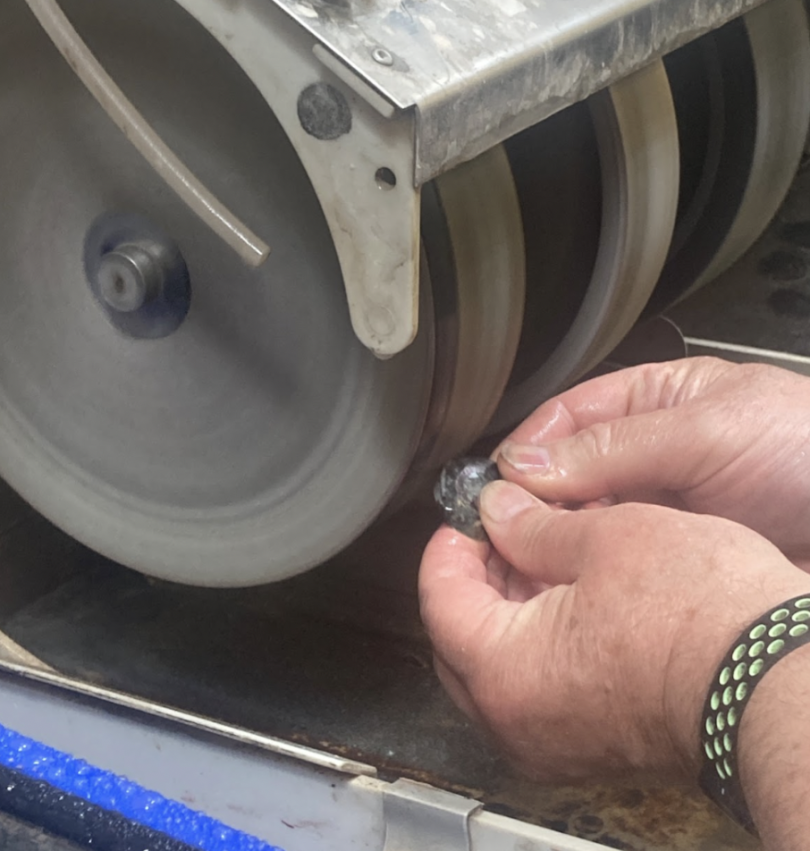
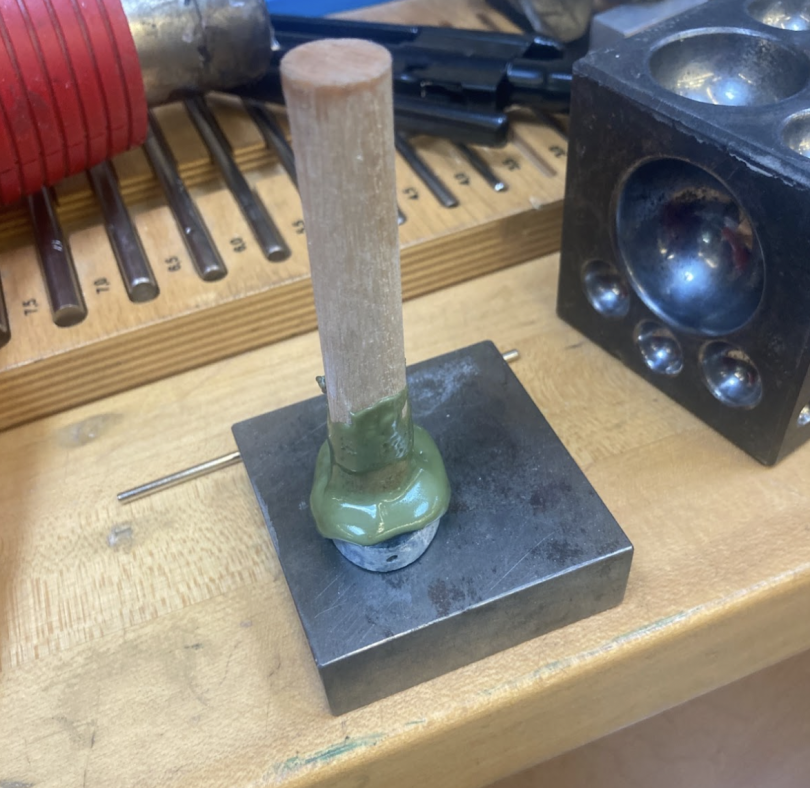
Day 2: My second session at the jewelry shop I decided on the shape for my stone, and drew it on the bead with a stencil and sharpie. Then Jeff showed me how to use the grinding wheels (pictured right) to shape and polish my bead. We used melted wax to attach my bead to a small stick, so that my fingers wouldn't be close to the abrasive material while shaping the stone. I shaped the stone, working my way through all 6 wheels consecutively to eventually create a domed side of the bead. This took a long time, and a lot of trial, error, and help from Jeff.

Day 3: During the third session I detached my stone from the wax stick and cleaned up and polished the sides of the stone on the grinding wheels. Then, I drew my design to be engraved on a practice stone, and began learning how to use a handheld rotary grinder. After I recreated my engraved design on a practice stone, I moved on and began engraving it on my real bead.

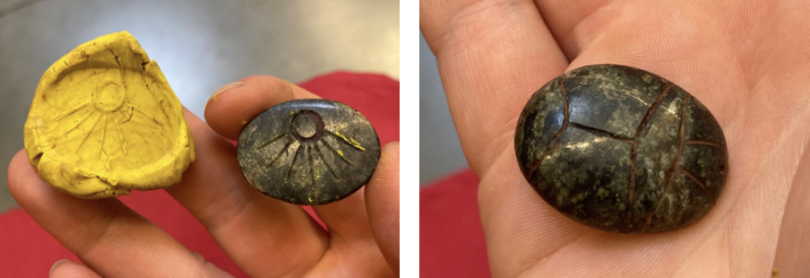
Day 4: During my fourth session I finished engraving my design on the bead. On the domed side I had engraved a scarab (top left), and on the flat side I engraved a symbol of the sun. These are both symbols popular in Egyptian art and jewelry. Both sides were carved in intaglio (carving the design into the background, as opposed to carving the background away and creating a relief—in ancient times referred to as cameo) and the flat side could double as a signet ring (a kind of ring worn in antiquity that doubled as a wax seal for letters, usually with a family symbol on it). I pressed the bead into a play-dough-like clay to make sure I got the desired intaglio relief to function as a signet ring (bottom left). During this session Jeff and I also brainstormed discussions about fitting the ring, and created a prototype with a simple bent strip of sheet silver and a simply cut wire serving as an axle.
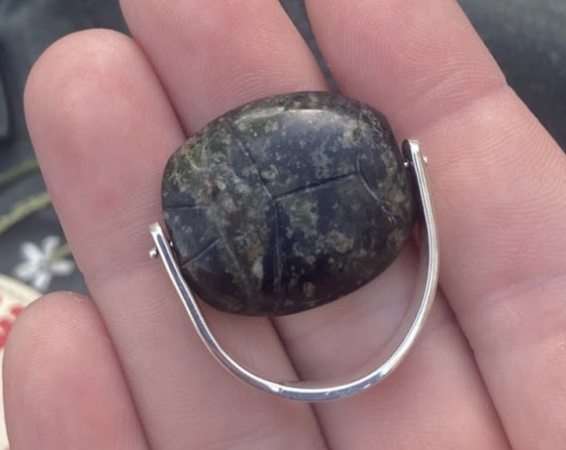
Day 5: During my fifth session we finished the ring. We figured out how to size it, where to drill the holes so that it would turn well, and we even reshaped the side of the beads to better adapt it to smooth turning by flattening the side with the perforations. I cleaned the bead, assembled the ring, and then Jeff welded the pin ends of the axle and showed me how to polish the silver band of the ring. Finally, the ring was finished, and I wore it out of the studio.

Overall: Everyone at the studio was kind and informative during each visit. And (even though the Department of Classics was paying for it this time) making the ring only cost $10! At the Jewelry Studio—which is open to every undergraduate student, even if they're not doing a project for a class like I was—you only have to pay for the materials you use. I had such a wonderful time with this project that I hope to spend more time at the Jewelry Studio this summer!


